Showing posts with label preschool. Show all posts

Cinnamon Ornaments

So I was trying to think of a cute way to label some family gifts and thought it would be fun to make ornaments and then it's not only a tag, it's a gift! What better than an cinnamon ornament. Super easy and they smell amazing!

Pin It

What you need:
1/4 cup of applesauce (and then a little more just in case)
1 cup of ground cinnamon
1/2 cup of glue (note: a typical bottle of kids glue is 4oz so you will need a full one of these)
Cookie cutter in desired shape
Rolling pin- I add this because, as embarrassing it is to admit, I do not own one. This would have been MUCH easier if I did. It is now on my shopping list!


How to:
1) Mix together the ground cinnamon and applesauce
2) Add the glue and mix to make thick dough (add more applesauce if too dry)


3) Roll out on a flat surface, approximately 1/4 of an inch thick. Too thick, they wont dry, too thin, they will crumble
4) Cut out shapes and move to cookie sheet
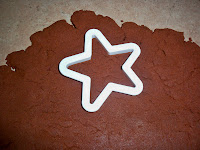


5) Using a straw, make holes


6) Bake at 200 degrees for 2 hours, flip over half way (or air dry for 24 flipping over every 4-6 hours)
7) Add ribbon and enjoy.


Oh Noodle Tree, Oh Noodle Tree...

Last minute effort to throw together a craft project resulted in these:
(Hubby is home this week-Yay!! But our schedule is WAY off)


We call them "Noodle Trees".  :) Thankfully I had a bunch of random pasta in my pantry! Then I just drew a tree (not the best but they worked) and the kids decorated.


Now we're off to dance for Christmas parties. Should be fun! :)

More Snowmen

To go with the snowmen theme from yesterday, today we made snowmen with cotton balls.
Nothing too crazy but the kids had fun with it. We used skittles for the eyes and buttons and glittery snowflake stickers.

I drew a template with pencil to help.

Yes, my child is always naked. Well, except for when she's in a princess or Tinkerbell costume. Today it was Cinderella which came off for the project so she didn't get glue on it.

Apparently this one's eyes and nose flew off when the snowman sneezed.

Pin It

Snow Paint

It's time to come to terms with the fact that it is winter. The snow from last weekend did not melt and since it's been in the teens and twenties the last few days, it's time to accept the change in season. The kids keep asking if we can go out and make a snowman. Since there isn't enough snow yet and it's too dang cold, I decided to do some snowman making inside. I have 2 snow paint ideas that I've wanted try and decided instead of choosing one, I would do both.

First is the glue and shaving cream paint but I added glitter to it to make it fun (the little stuff, the big glitter flakes didn't work out as well). You can kind of see the glitter in the pictures if you click on it and see it larger. We just used paint brushes to make snowmen and snow on black paper. I didn't measure anything, just dumped in a bowl till it looked like enough. This stuff has a really cool 3D puffy paint type of look to it.


Leave it to my daughter to turn it into a finger painting project.
Some of the other snowy designs


Pin It


The second recipe I just learned about last week in class and thought it looked interesting. It's equal parts of flour, salt and water. Mix it together (adding a tiny bit of water as needed until it's paint consistency). I then added glitter (both small and large). The kids cut snowflakes (I helped with most) and then they used small paintbrushes and painted the snowflakes. It took awhile for them to dry but once they did, the texture turned out SO cool! I admit, I made a bunch of my own snowflakes like this to decorate my front window.


Just after painted- still wet


After it dries, it has a really cool texture!


Pin It


I think our indoor snowmen pictures were a success.

Spaghetti spaghetti all over the place...

"...up to my elbows, up to my face."

Shel Silverstein has got to be the best poet alive (that statement is probably why I didn't do so hot in my Creative Writing class' poetry unit). He does have a ton of great poems though. The spaghetti one has been a long time favorite of mine and as much as I hate to admit it, I say it to myself every time I make, see or even think of spaghetti.

Anyways, I'll get to the point. Spaghetti is fun. To eat and to play with. It's especially fun with food coloring and construction paper.


The how to:
  1. Cook spaghetti, strain
  2. Divide spaghetti into plastic Ziplock bags and then drop in a few drops of food coloring. Mix up until all spaghetti is covered.
  3. Put spaghetti back into strainer and rinse well. This will only rinse off the extra food coloring so little hands (and big ones, I had fun with this one) stay clean.
  4. Children then stick spaghetti to paper. No glue needed. Perfect for little ones since it's safe to eat. :) 
Just a heads up, this is not a craft that should be kept for very long. The spaghetti will eventually dry and it doesn't look as cool... And if it cracks, it could make a mess (which is not allowed in my house).
Enjoy!
Pin It


And just for fun, here's the rest of the poem in case you haven't heard of it.


Spaghetti

Spaghetti, spaghetti, all over the place,
Up to my elbows—up to my face,
Over the carpet and under the chairs,
Into the hammock and wound round the stairs,
Filling the bathtub and covering the desk,
Making the sofa a mad mushy mess.

The party is ruined, I’m terribly worried,
The guests have all left (unless they’re all buried).
I told them, “Bring presents.” I said, “Throw confetti.”
I guess they heard wrong
‘Cause they all threw spaghetti!

up